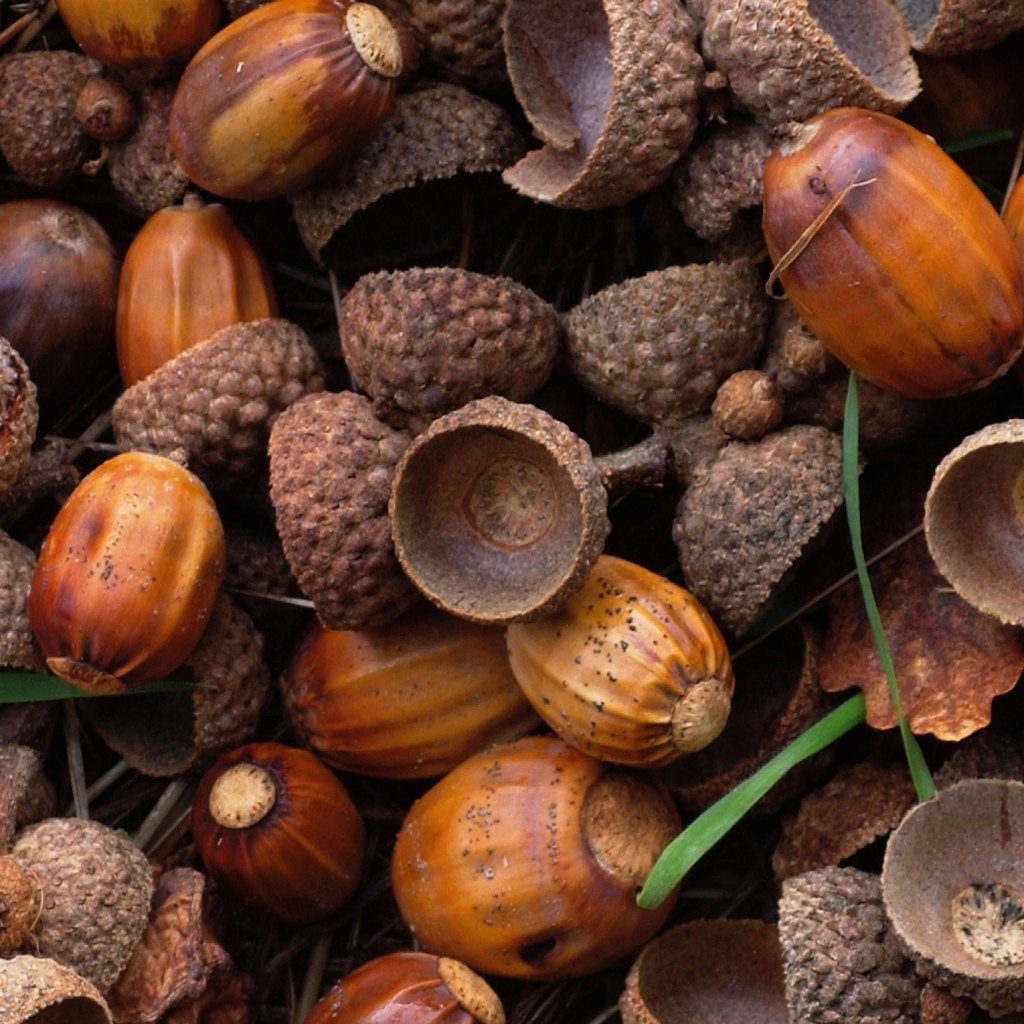
Foraging and Feasting on Fall Acorns
In How to Forage for Wild Foods without Dying, expert forager Ellen Zachos teaches you how to identify, harvest, and prepare acorns to use in baked goods, soups, and more.
Acorns are one of the most versatile wild foods you can harvest. They can be made into a gluten-free flour that adds richness to sweet and savory baked goods, or they can be eaten as nuts, mixed into burgers, or used as a soup base. They’re an excellent source of starch and fat. You will never starve if you have acorns.

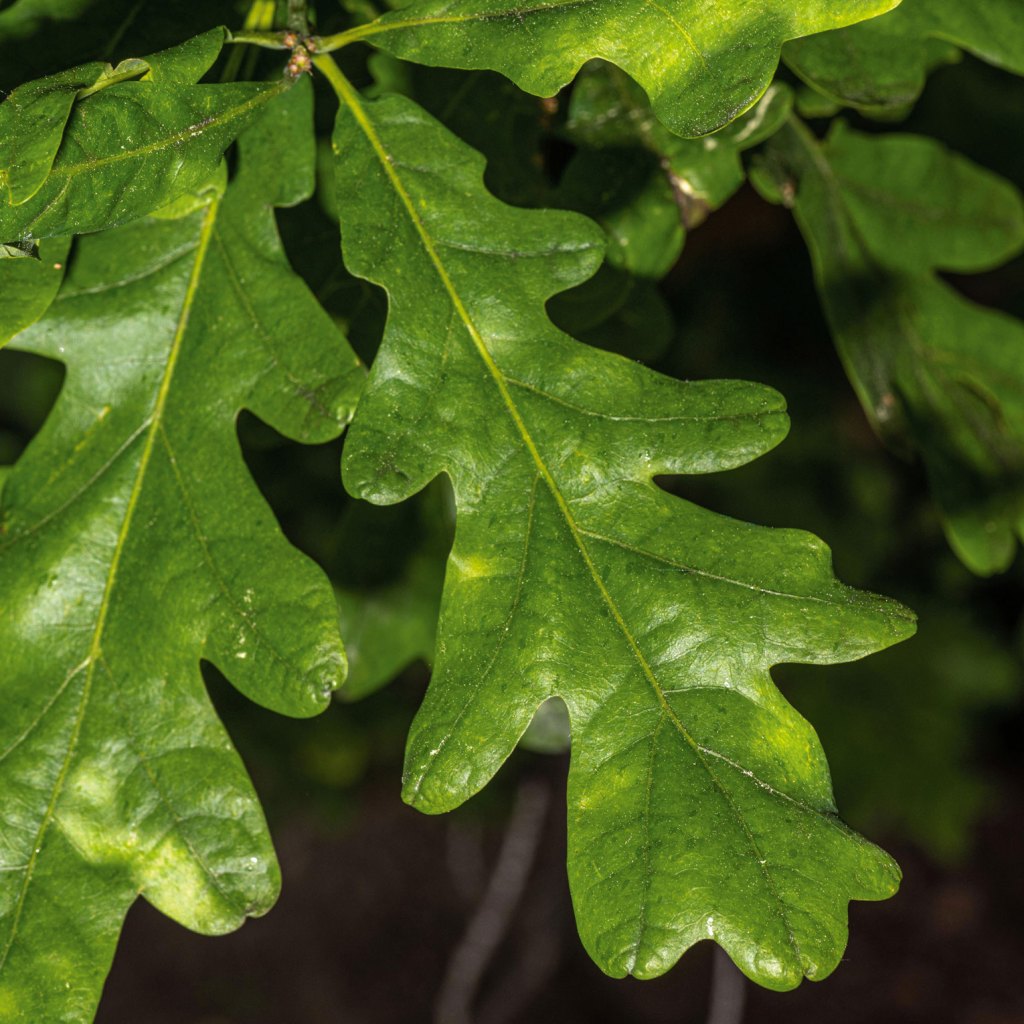
Almost everyone recognizes an oak tree. The characteristic lobed leaves make it easy to identify. White oaks have a reputation for the tastiest acorns, while red oak acorns generally require more work to make them palatable because of their higher tannin levels. Fortunately, as long as you have reliable taste buds, you don’t need to know which kind of oak you’ve found.
Harvesting
In the fall, look for the biggest acorns you can find, because the most labor intensive part of processing acorns is the shelling. If you can shell 50 large acorns to get the same amount of nut meat you’d get from 100 small acorns, you’re ahead of the game. Collect your acorns after they’ve fallen from the trees, and discard any nuts that still have their caps attached or that have a small hole in them. A healthy nut will separate from its cap when it falls. A hole indicates the exit route of the oak weevil larva, which has been feeding on the nut all summer, so there probably isn’t much deliciousness left inside. When the nuts fall to the ground in autumn, the larva chews its way out of the nut and pupates in the soil, emerging the following year as a full-grown weevil, which then lays its eggs inside a young (and impressionable) acorn.
Fall is a busy season for foragers, and since acorns are less perishable than many wild edibles, I often freeze them until I have more time to work in the kitchen. Freezing keeps the acorns fresh, and also kills any weevil larvae that may have come along for the ride. The downside is that thawed acorns hold moisture, which makes them harder to shell. But you can remedy this by dehydrating them for a few hours before shelling. If you’re going to make acorn flour, keep the dehydrator’s temperature under 150°F (65°C) so as not to cook the starches in the nut. Those starches will help your acorn flour bind when you bake with it.
The first time I shelled acorns I placed a few nuts at a time between two dish towels and cracked them with a rubber mallet. Acorn shells are thin and easy to crack, but once you start to process acorns in greater numbers, consider getting a nutcracker.
Feasting
Shelled acorns must be leached of their tannins before they can be eaten (see below for instructions). While several foraging friends swear that a sweet acorn exists, one that requires no leaching, I have never met this mythological acorn. Unleached acorns not only taste bitter, but consuming large amounts of tannins reduces the efficiency with which your intestines absorb nutrition. That’s not a good thing.
So how will you leach your acorns? The answer depends on how you plan to use your nuts. If you’re going to use your acorns as flour in baked goods, cold leaching is the way to go. Acorn flour has a rich flavor and is gluten-free. Since gluten is what helps baked goods rise and bind together, you’ll often see recipes call for half acorn flour and half regular flour. Baked goods made with 100 percent acorn flour tend to be crumbly.
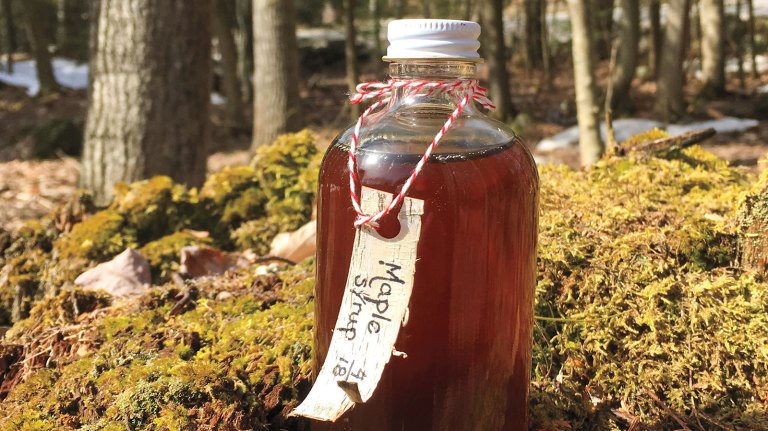
Hot leached acorns can be ground or chopped and used in baklava, falafel, as a coffee substitute, or as a rich soup base. And acorn syrup makes an excellent cocktail ingredient.
How to Leach and Store Acorns
You can either hot leach or cold leach acorns. Cold leaching results in a more versatile end product, one that can be used as flour as well as in any way you’d use hot leached acorns. Cold leaching preserves the starches in acorns, which helps the flour bind. Remember, acorn flour contains no gluten, a protein that helps baked goods both rise and bind together.
Hot Leaching
To hot leach acorns, fill a large pot one-third full with acorns, then cover with an equal volume of water. Bring to a boil, and boil until the water turns dark brown. Pour off the water and repeat the process several times. You may read that you should continue boiling in changes of water until the water remains clear, but that’s bad advice. The water often remains dark long after any hint of bitterness is gone. Trust your taste buds instead of your eyes. Start tasting the acorns after the third or fourth change of water. When there’s no trace of bitterness, your nuts are leached.
Cold Leaching
There are a few methods for cold leaching acorns: using a toilet, using a jar, and using a colander with running water.
Toilet method. The easiest way to cold leach acorns is to use your toilet. To be clear: I’m talking about the toilet tank, not the toilet bowl. Empty the toilet tank, scrub it, then refill it with clean water. Put your shelled acorns in a jelly bag and place the bag into the toilet tank. Each flush runs cold water through the nuts, leaching them of their bitterness. Taste test at intervals after 24 hours. You may need as long as 2 to 3 days, depending on how often you flush.
Jar method. If the idea of using the toilet makes you squirm, try the jar method. First you’ll need to grind your shelled acorns. You can do this in a high-quality blender, like a Vitamix, or with a coffee bean grinder if you’re doing a small batch.
Find a large, clear jar with a tight-fitting lid. Fill the jar halfway with ground acorn meal, then top it off with tap water. Close the lid, and give the jar a good shake, then move the jar to the refrigerator and let sit for 24 hours. The acorn meal will settle out of the water, and the water will turn brown as the tannins leach from the nuts. Carefully pour the water off the meal. Don’t worry about getting every last drop. Refill the jar with water and replace the jar in the refrigerator. Let the jar sit for 24 hours, then pour off the water again. Repeat the process a third time, then taste the acorn meal. If it’s bitter, continue to change the water every 24 hours until no trace of bitterness remains.
Running water method. If you’re in a big hurry for cold leached acorn flour, try this method: Place a large colander in the sink and line it with a dish towel. Pour your shelled, ground acorns into the colander, then run a stream of cool water into the acorn meal and stir constantly for 8 minutes. You should be able to stir without spilling, which is why this is best done in small batches in a large colander. When done stirring, taste the slurry. If there is any bitter flavor, let the water run for another 2 or 3 minutes and taste again.
Long-Term Storage
For whole leached acorns, dry in a dehydrator on the lowest possible temperature. You must keep the temperature below 150°F (65°C) to avoid cooking the starch. If you don’t have a dehydrator, you can dry your acorns in an oven or warming drawer, as long as the temperature is below 150°F (65°C). The nuts are fully dried when they are brittle and can be broken in half with a snap.
All acorns have a testa, which is a thin, bitter, papery skin located between the nut meat and the shell. The testas of white acorns adhere to the shells, but the testas of red acorns stick to the nuts. Hot leaching removes most testas, but if you cold leach, you’ll need to rub off the testas before you cook with your acorns. Fortunately, after drying, the testas fall away with a gentle rubbing.
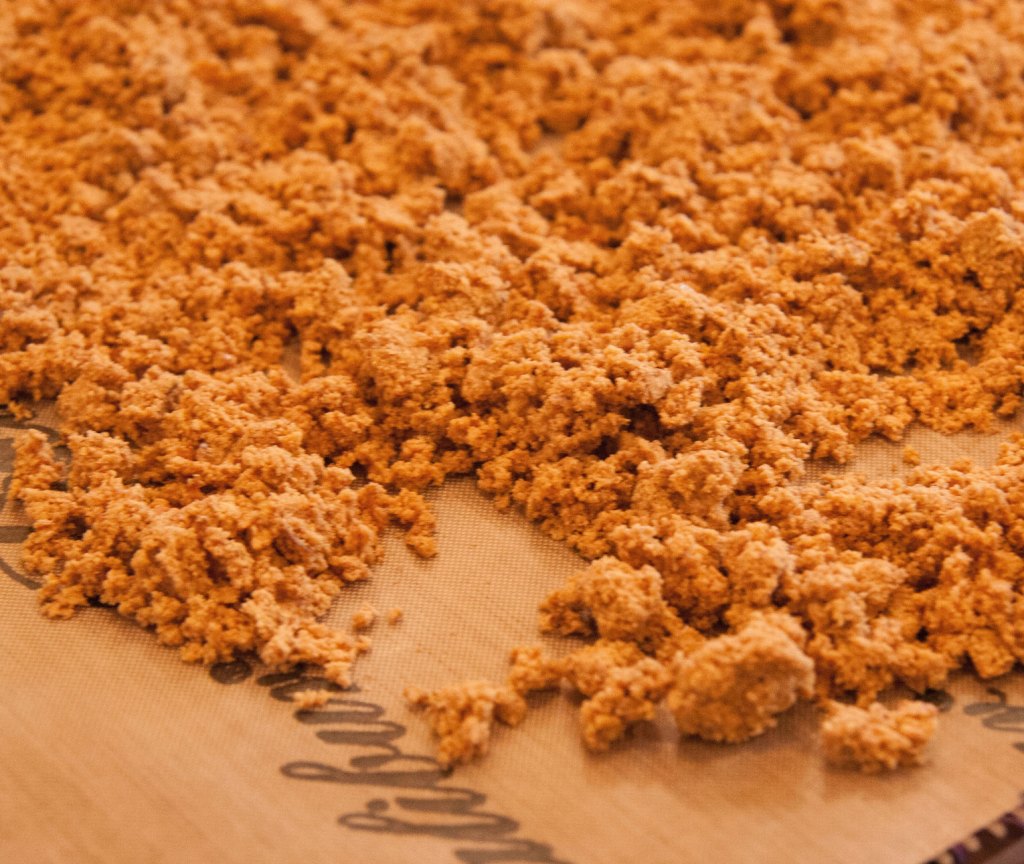
For leached acorn meal, once the bitterness has been leached via either the jar or the running water method, pour the meal out into the center of a dry towel. Gather the four corners of the towel together and twist the towel until water begins to drip from the bottom of the dish towel. Continue twisting and squeezing to remove as much water as you can. Warning: This will stain the dish towel, so don’t use your finest family heirloom.
If you have a dehydrator with fruit leather sheets, spread the moist acorn meal across the sheets and set the temperature to the lowest possible setting. Depending on the humidity where you live, your meal will take between 12 and 24 hours to dry. Check it after several hours and break up any large clumps to speed the drying process. An oven or warming drawer will also work, as long as the temperature is below 150°F (65°C).
Once the acorns (whole or ground) have dried, they’re ready to be measured, sealed, and stored. Acorns are high in fat, which may turn rancid if stored at room temperature, so freezing is recommended for long-term storage.
Oak: Know Before You Eat
Alamy Stock Photo.
Where and How to Find
- Trees require full sun to thrive.
- Plants grow almost everywhere, but not all oaks are created equal from the forager’s point of view; look for trees that produce large nuts.
- Scrub oaks of the high desert produce few (if any!) teeny nuts.
- Look in parks, abandoned homesteads, and in residential neighborhoods (don’t forage on private property without permission).
ID Checklist
- Trees can be deciduous or evergreen depending on the species.
- Most oaks hold on to their dead leaves through the winter, which makes them stand out in the landscape—this is a helpful ID characteristic.
- Plants may be small and shrubby or single stemmed and more than 100 feet tall.
- Mature oaks are usually among the largest trees in the landscape.
- Trees may be wider than they are tall.
- Leaves are usually lobed, but some oaks do not have the characteristic lobes.
- Leaves are leathery, medium to dark green, and 2–10 inches long.
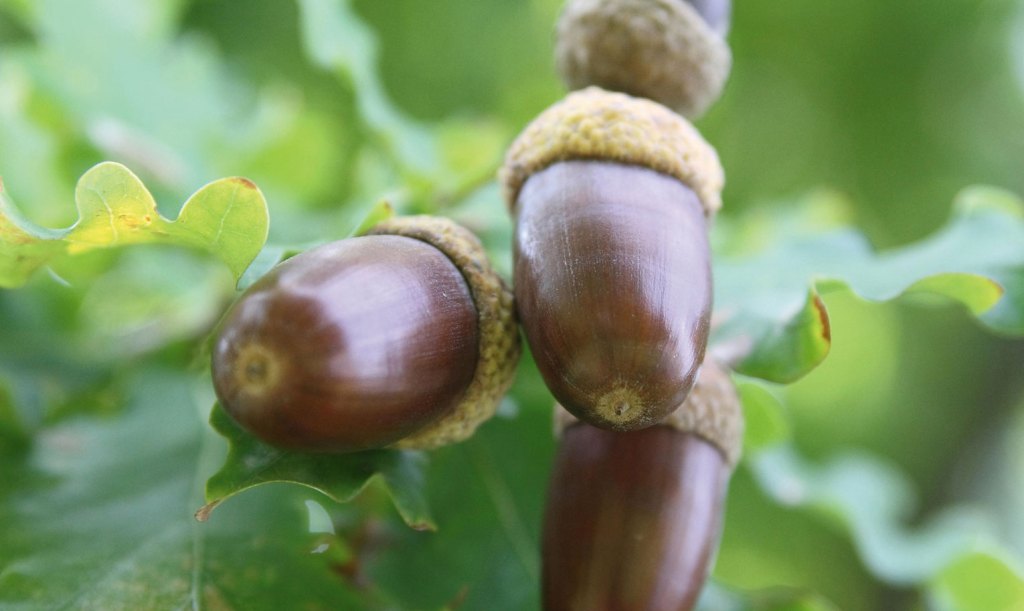
- Acorns have a point on the bottom and a cap on the top.
- The acorn cap may sit on just the top of the nut, or may cover almost the entire nut, depending on the species.
- No other nut looks like the acorn.
Excerpted and adapted from How to Forage for Wild Foods without Dying © Ellen Zachos.

This on-the-go guide is perfect for new foragers eager to learn about the edible plants they're most likely to find, no matter what region they're in, and provides photos and easy-to-follow identification and use guidelines for the 40 most common—and most delicious—wild plants.
How to Forage for Wild Foods without Dying is a book for anyone who likes to go on nature walks and would like to learn about the edible plants they’re most likely to come across—no matter what region they’re in. Author Ellen Zachos shares her considerable expertise, acquired over decades of foraging in every part of North America. She offers clear, concise descriptions of edible wild plants, in addition to any potential lookalikes, as well as critical information about proper harvesting, processing, and cooking. Zachos has curated the plant selection to include only the 40 most common, most delicious edible plants, ranging from black walnuts and juniper berries to elderflowers, burdock, fiddlehead ferns, lambsquarter, wild garlic, sunchokes, and many more. With Zachos’s expert advice and easy-to-follow guidelines, readers will be confident in identifying which plants they can safely eat and which ones they should definitely avoid. Easy instructions for preparation and eating for maximum enjoyment are included.
Related Books
-

How to Forage for Mushrooms without Dying
-

Backyard Foraging
-

The Wildcrafted Cocktail
-

Dandelion Medicine, 2nd Edition
-

The Backyard Homestead