Design Tips for Planning Your Skoolie Kitchen
Cook and eat comfortably in your home on wheels with these clever space-saving tips and creative hacks for outfitting your skoolie kitchen.
Many folks consider the kitchen to be the most important room in a home, and for good reason! A typical kitchen in a regular house includes counters and sink, upper and lower cabinets, table and chairs, and appliances. There’s no reason you can’t have these things in your skoolie, too.
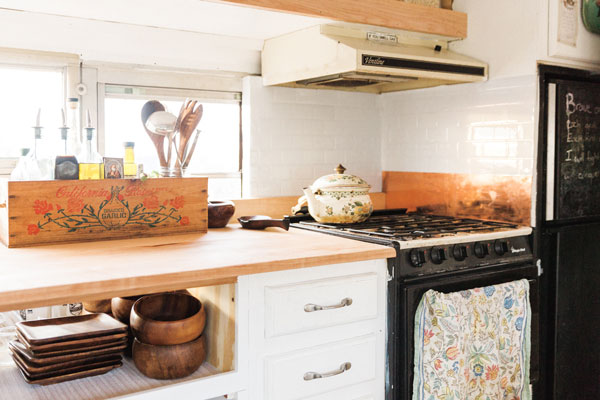
Cabinets and Countertops
Cabinets and countertops are the primary design elements of any kitchen space and usually determine a kitchen’s overall size. For example, if you want a 6-foot-long counter mounted along the wall of your bus, that gives you a 45-square-foot kitchen area — the counter length multiplied by the width of the bus (7½ feet).
Countertop depth, measured from front to back, is largely determined by the depth of the base cabinets or shelving structure below. The depth of a standard kitchen counter is 25 inches, so a counter running along one wall leaves you with just under 5½ feet of kitchen floor space. Then again, there are no norms with skoolies, so why not look for another option and save some floor space?
One of my favorite skoolie hacks is to find a used bathroom vanity to repurpose as a kitchen cabinet. Many “comfort height” bathroom vanities are the same height as kitchen counters — at 36 inches, including the countertop — but are only 22 inches deep. That means you gain an extra 3 inches of floor space, and every inch counts in a tiny dwelling! Perhaps you will add those extra 3 inches to your table so there’s enough space for guests.
Kitchen and bath cabinets can be found used or can be built from scratch. Yes, you can buy relatively inexpensive unfinished stock cabinets from a home center. But the fact is, used cabinets are easy to come by. Kitchen and bathroom remodeling is a favorite American pastime, and many homeowners and builders either donate perfectly good cabinets and vanities to building materials recyclers (which resell the items at bargain prices) or sell them online.
Another hack is to get used cabinets and cut the cabinet face frame from the box (the shelving portion). You can then install the face frame onto custom-built cabinet boxes or shelves, making the storage unit any depth you like, depending on how deep you want the counter.
For the countertop itself, you can build a custom surface or buy a prefab countertop and trim it to fit. Plastic laminate countertop sections are commonly sold at home centers and can be cut with a circular saw or jigsaw.
Regardless of what you use or build for cabinets and counters, keep in mind the size of the sink you’d like to use to make sure it fits inside the parameters of the counter.
Wall Cabinets
Wall, or above-the-counter, kitchen cabinets are challenging to fit and install because of the ceiling curve. Creating a template to represent the ceiling curve is helpful for trimming the backs of cabinets to fit, and you can hang them with an ample number of L brackets.

There are endless options for building custom kitchen cabinets. Remember, you can keep the budget low if you scout for reclaimed materials.
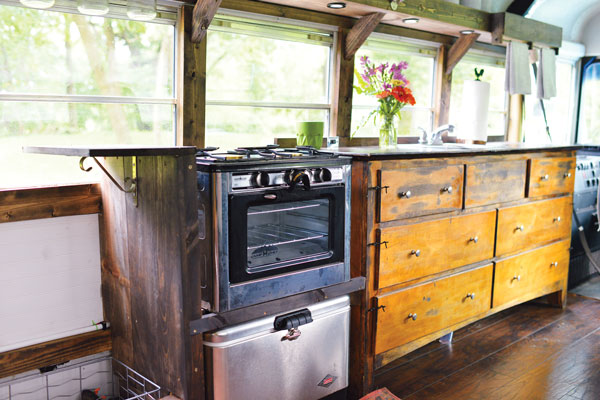
Kitchen Appliances
Basic kitchen appliances for a skoolie include a cooktop or oven and a refrigerator. A microwave, toaster, dishwasher, garbage disposal, and such are not commonly priorities. A microwave uses a ton of electricity, toasting can be done with an oven, and it’s doubtful you’ll have enough dishes in your tiny kitchen to justify a dishwasher!
Cooking
A variety of slide-in or drop-in cooktops are available online, but if you need an oven as well as a cooktop, Camp Chef sells an adorable camp oven with a stainless steel finish and in a nice small size. You can find old ovens removed from RVs, but be cautious of their condition.
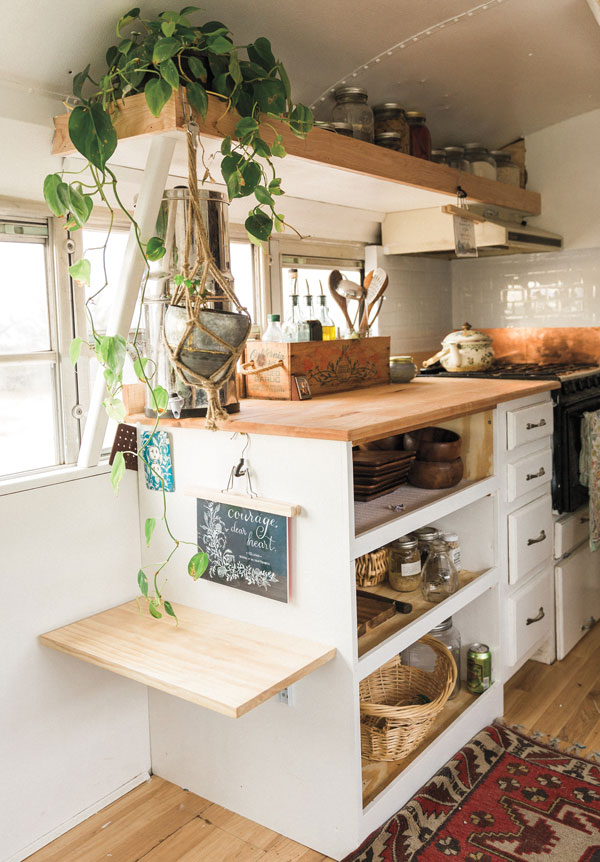
A great alternative to overhead cabinets is a shelving system with no cabinet doors. Each shelf has an outer ledge that keeps items from falling when the bus is on the move. Another popular idea is to take mason jars, attach the lids to the underside of a shelf with small wood screws, then store items inside the jars and simply screw each jar to its permanently secured lid. You can install L-shaped shelf brackets between the window pillars and attach your shelf on top of them, or you can rest the back of your shelf above the windows and use small chains between the shelf edge and ceiling for support. Shelves weigh less than cabinets and are much more budget friendly.
Nearly all of the suitable cooktop/oven options run on propane. Some use small disposable propane canisters but have the option to connect to a larger propane tank. Smaller camping stove burners sometimes use butane fuel. If you choose a large propane tank, do not store the tank inside the bus; keep it secured to the back or use a horizontal underbody tank. When using any gas-fueled cooking equipment, make sure the area is ventilated and your bus has a carbon monoxide detector.
Refrigeration
There’s a refrigeration system for skoolie kitchens in every budget range. On the low end, a simple cooler or a fancy Yeti cooler functions well for part-time excursions, especially if you’d like to move the cooler in and out of your bus or bring it with you in another vehicle. The cons of a basic cooler are ice usage, melted ice that will need to be dumped, and space limitations. On the other hand, when you’re traveling you can make it a habit to pick up a bag of ice whenever you fill up on fuel, then use the melted ice for rinsing water or pet water. Or you could buy a portable ice maker capable of making up to 26 pounds of ice in 24 hours and run it for a few hours using solar batteries or a power inverter connected to your alternator while driving.
There are 12-volt powered coolers available that don’t need ice and can run directly off solar batteries. The manufacturers Dometic and ARB carry lines of powered coolers that can consume less than 1 amp-hour per hour. Although these brands are costly, they are considered to be a one-time investment because of their durability. Less expensive powered coolers, such as models from Koolatron, are available, too.
A traditional upright refrigerator will take up more space than a cooler but may suit you if space allows and extra capacity is necessary. You can power this type of refrigerator with a power inverter, but don’t skimp on the inverter because it will operate full time, and you don’t want to wake up to a refrigerator full of spoiled food. A 7½-cubic-foot apartment-size refrigerator, for instance, can consume 75 or more amp-hours per day. Compare that power usage to the 12-volt coolers mentioned above.
Be sure to secure your refrigerator to your bus! Large L brackets between the fridge and bus wall supports and floor work well. Be careful: don’t use a screw that is so long that it punctures the inside wall of the refrigerator when attaching the L bracket. I suggest using two L brackets attached to the wall and two on the floor.
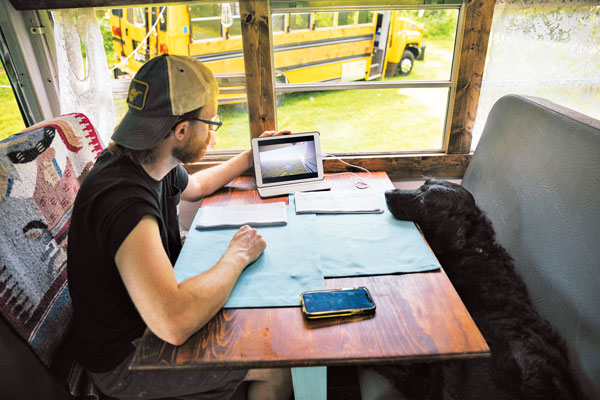
Kitchen Table Ideas
Kitchen table booth seats can double as passenger seating while your skoolie is on the move, or the table can be attached to the wall with hinges so it can fold out of the way to add floor space when needed. In any case, it’s smart to attach your kitchen table to the bus wall to keep it secured.
Many folks like to build booth-style seating for their tables that also have storage underneath the seats.
Another great kitchen hack is to repurpose two of the original bus seats as seating at the kitchen table. Two bus seats, one from each side of the bus, can be turned to face each other and spaced any desired distance apart. You can secure these seats to the bus floor in the same fashion as they were originally, but use new bolts that can pass through the extra floor thickness.
The side of the seat that is against the window can be reattached to the lower wall side rail; however, you will need to add a piece of wood on top of the wall rail to compensate for the extra floor thickness. You can also repurpose the bus seat cushions by themselves to use as booth cushions.
Excerpted and adapted from Skoolie! © Will Sutherland.

Related Books
Featured Titles
-

Compact Houses
-
Compact Cabins
-

Micro Living
-
Microshelters
-
Install Your Own Solar Panels